Making Your Documents Accessible With Acrobat Pro
Siteimprove
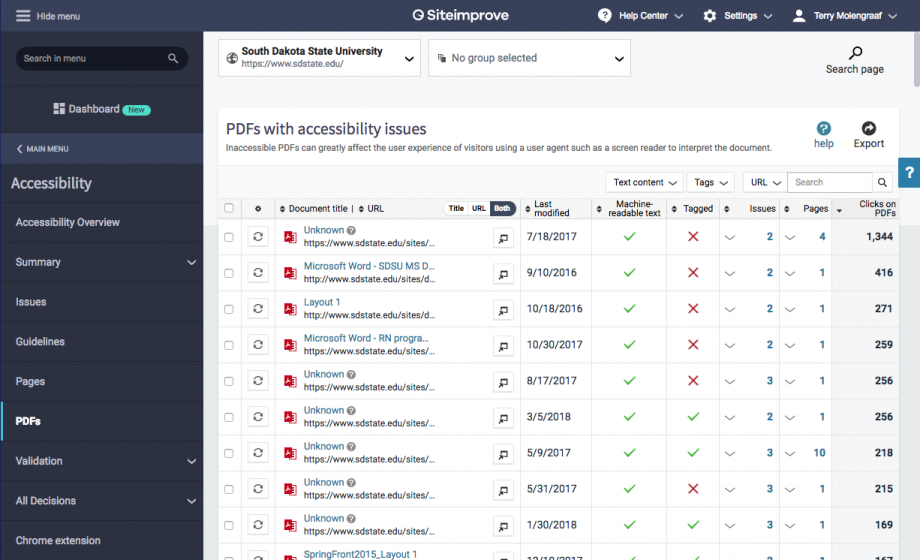
Go to Siteimprove and select Accessibility/PDF.
By default, Siteimprove lists documents with accessibility issues by most clicked.
Common Issues Flagged by Siteimprove:
- No machine-readable text – a scanned document.
- No tags.
- The document has no title.
- The document contains no headings.
- The first heading is not a Heading 1.
- The image has no alternative presentation.
- The document is missing a language definition.
- The form element does not have a label explicitly connected.
- The table has no table headings.
- The document contains untagged content.
Before you start, ask yourself:
- Is the content of the file current or should it be removed from the website?
- Should I take this content from the PDF and put it into a web page?
- If this must be a PDF file, do I have access to the original file from which it originally was generated?
NOTE: It is always easier to create an accessible PDF document if you start with a fully accessible document in the authoring software, like MSWord.
Creating accessible documents with MSWord
STEPS
- Download the file and open it in Acrobat Pro and run the Accessibility Checker.
- View/Tools/Accessibility/Open.
- In the right pane, click Full Check.
- In the Accessibility Checker Options Pane, leave the default setting and click Start Checking.
- In the left pane, fix any and all errors.
- Manually check color contrast.
- Fix any text with contrast less than 4.5 to 1 (Edit/Edit text and Images).
- For Logical Reading Order, go to the Tags Tool and "Walk the Tree."
- Fix any missing, mislabeled, incorrect and empty tags.
- Tip: When making changes with tags in Acrobat it easy to make a mistake and there is no undo button, therefore Save and SAVE often.
- After you have completed Step 4 do a final Save and congratulate yourself, you have an accessible PDF document.
- Upload the new accessible PDF file with the manage/file tool.
- Search for the file using *the-term.*
- Check the checkbox and Click Replace at the bottom.
- Click upload and select the file.
- Due the server cache, Siteimprove will not update the results of your work immediately (Can take several hours for the server cache to clear and begin displaying your new file).
Note: It is easy to fall into the trap of just fixing issues with a document. Keep in mind, however, the aim is to give individuals with disabilities the ability to easily consume the content of a document as those without a disability.
Resources
- Section 508 CoP: PDF Accessibility - Part One
- Section 508 CoP: PDF Accessibility - Part Two
- Metzessible PDF/UA Series: 02. Tagging Basics
- Metzessible PDF/UA Series: 03. Creating an Accessible Tagged PDF