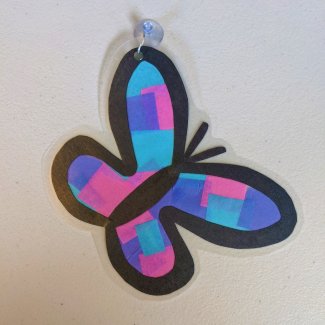
I’ve seen a lot of butterflies and other pollinators around lately – have you? Pollinators (like butterflies, bees, birds, and others) are so important to agriculture. If we didn’t have pollinators, we wouldn’t be able to have a lot of the foods we love and enjoy every day! Today, we are paying respect to a colorful pollinator – the butterfly – with this fun and simple suncatcher activity.
Find a helpful how-to video below:
Materials
- Scissors
- Writing Utensil (optional)
- Construction Paper
- Clear Con-Tact Paper
- Tissue Paper (multiple colors)
- Tape
- Hole Punch
- Suction Cup, Ribbon, etc. (something to hang your finished project in the window)
Instructions
- Using your scissors, writing utensil (optional), and construction paper, create and cut out an outline in the shape of a butterfly for your suncatcher design. If you aren’t a great artist, you can use things like cookie cutters, home décor, a clip art image off the internet, etc. for a starting point! Use the scissors to cut out the center of your design.
- Using your scissors and construction paper, cut out a butterfly body (a long, skinny oval shape) and two antennae.
- Cut up tissue paper into one-inch squares.
- Using your design as a guide, cut out two pieces of Con-Tact paper that are about two inches bigger than your butterfly.
- Pull off the backing to one piece of Con-Tact paper and lay it sticky side up on your workspace. Secure the corners with tape so it stays in place.
- Place your butterfly outline in the center of the Con-Tact paper. After your butterfly is secure, add in the body and antennae.
- Fill in the center of your design with tissue paper squares until it is full.
- Peel off the backing to your second sheet of Con-Tact paper and place it sticky side down over your design. This will seal your artwork in and keep other things out!
- Use your scissors to trim the excess contact paper off around the outside of your design.
- Use a hole punch to add a hole where you would like to hang your design.
- Using a suction cup, ribbon, etc., make a hanger for your suncatcher to hang in your window.
- Hang your artwork up for everyone to enjoy!
Tip: If you don’t have clear Con-Tact paper at home, you can also use things like laminating sheets (place your construction paper outline and tissue paper squares inside a laminating sleeve and run it through a laminator) or clear packing tape (lay down multiple pieces of tape with a slight overlap to create a sticky surface like the Con-Tact paper) to create these suncatchers!
Make-It Monday projects will be posted each Monday (except for holidays) throughout the museum closure for COVID-19. For a full list of previous projects, visit Make-It Monday.
Questions? Contact Sarah, the museum's education coordinator.