Moving to Drupal 10 was a necessary first step as we begin the rebuild process. Web editors may notice difference beginning on Monday, Nov. 6, 2023.
Do not hesitate to contact web support with any questions you encounter when editing.
Here are some highlighted changes:
- Look: The editor function does look different. The new theme utilizes much more white space. However most functions remain in the same place.
Menus: There have been changes to the way menus are placed on pages. Further instructions and updates are coming soon.
For now, if you need to add a menu to a page, please contact web support. Once the menu structure is in place on a page, you can move menu items around via the editor tool as before.
- Buttons/New window: Links can be changed to buttons or open in a new window, just as before, but the steps to do so are different.
- Highlight text to link on the page.
- Choose the link icon from the toolbar.
- Enter link under Link URL
- Open the Advanced menu
- To make a button: In "CSS classes", type the word button (lowercase)
- To open in a new window: Move the slider over so it turns green.
- Click the checkmark.
- Images: Images have a new editor toolbar once placed on a page. Click on the image for the toolbar to appear.
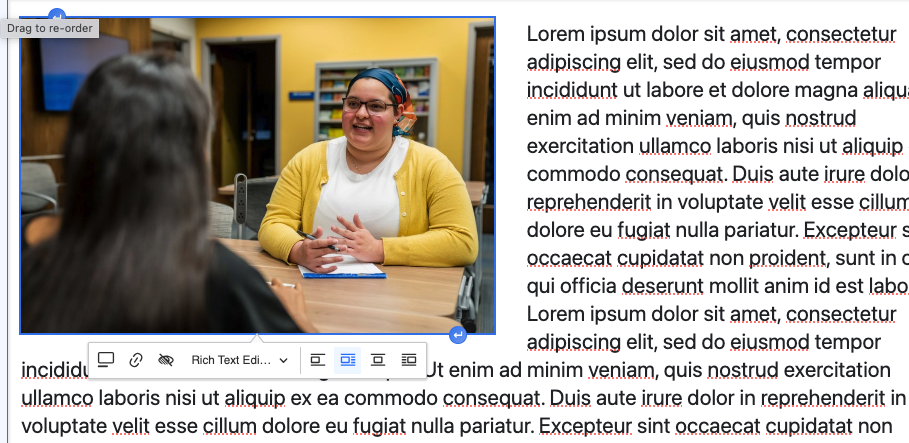
- Image toolbar (icons described in order from left to right)
- Caption: Toggle on or off from here. This places a caption box underneath the picture. Click on the box and type your caption in the field "Enter Media Caption"
- Link: Link the picture to another page or site.
- Alternative Text: This is required on all images when they are loaded. You can see the default text and change it for this instance if needed.
- Rich Text Editor: From the dropdown list, you can choose the size to display. (small, medium, large)
- Wrapping: Choose how you want the image and text to wrap around each other.
- Tables: Tables have a new editor toolbar once placed on a page. Click on any cell in the table for the table toolbar to appear.
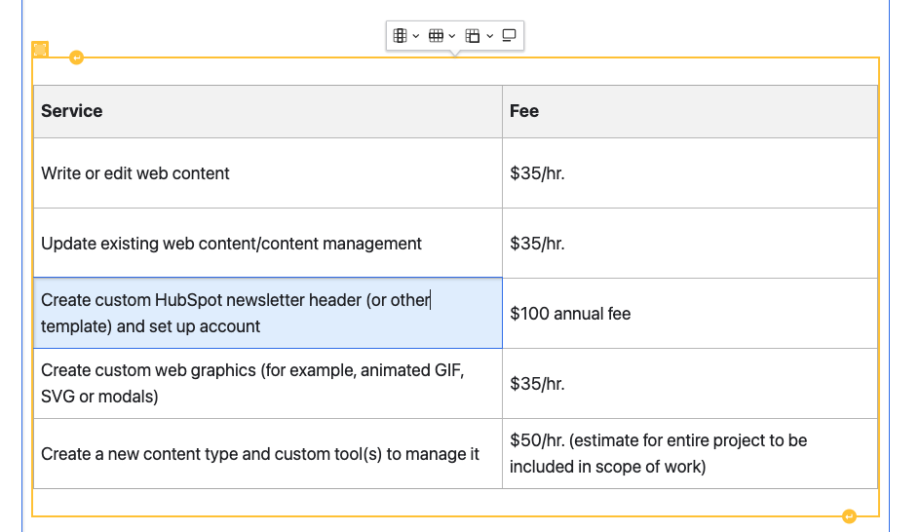
- Table Toolbar (icons described in order from left to right)
- Columns: From the dropdown choose to insert or delete columns. If the column is a header, toggle on the header slider at the top of the dropdown list.
- Rows: From the dropdown choose to insert or delete rows. If the row is a header, toggle on the header slider at the top of the dropdown list.
- Split/Merge cells: Select cells to merge or split.
- Caption: This places a caption box above the table. Click on the box and type your caption in the field "Enter Table Caption".