One of my favorite activities to do during museum field trips each spring is make garden gloves! When I ask, students are always eager to tell me what a plant needs to grow (soil, sunlight, water, and air). I adore seeing the students get excited to start growing their gardens, but what I love even more is seeing their reaction when I tell them we are going to start growing this garden using a plastic glove and cotton balls instead of soil! By using these materials to start of your seeds, you can see how seeds germinate and start to grow roots, which you typically can’t see if your seeds are in the soil. If you are ready to start your garden for the year, gather your supplies and follow these directions!
Find a helpful video on how to start your garden glove below:
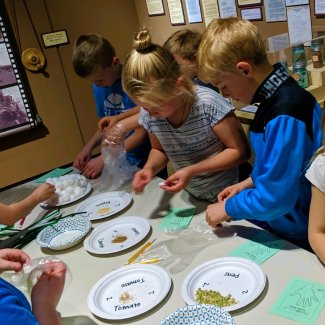
Materials
- Plastic Glove (Make sure the glove is CLEAR so the sunlight can get to the seeds – large food service gloves work the best, and the blue or purple gloves you find at the doctor or dentist don't work. Don’t have access to a glove, no problem! Use a plastic sandwich baggie to simulate a glove. You can even use staples to make your fingers if you want!)
- 5 Cotton Balls
- Seeds (I like to use five different types of seeds so we can grow a different plant in each finger, but you can use whatever you have on hand.)
- Bowl of Water
- Pipe Cleaner
- Pencil
- Paper
Instructions
- Gather all your supplies in an area where it won’t hurt if it gets a little wet.
- Using a pencil, trace your hand on a sheet of paper and write your name and date at the top. You will use this to remember what seeds you planted in each finger and what date you planted it on.
- Take your first cotton ball and soak it in your water. Squeeze the cotton ball over the bowl so it isn’t dripping any water but still damp. It should look nice and flat (like a pancake)!
- Take one of your seeds and place it in the middle of the cotton ball. Fold the cotton ball in half around the seed (like a taco) and place it into a finger in your glove. If you are having trouble getting the seed and cotton ball to the bottom of the finger, you can use your pencil to gently move it down to the tip of the finger.
- On your paper, write down what seed you put in each finger.
- Repeat steps 3-5 until each glove finger has a cotton ball and seed inside.
- Using your pipe cleaner, tie your glove shut so your seeds can’t fall out. With the ends of your pipe cleaner, bend a hook shape so you can hang it in a window.
In the next few days, you should start to see your seeds sprout roots. If your cotton balls dry out, you can add a little bit of water to keep the seeds moist. In the next few weeks, you can transplant (or move) your plants to a pot with soil in your house or into your garden!
Thinking Thursday projects will be posted each Thursday (except for holidays) throughout the museum closure for COVID-19. For a full list of previous projects, visit Thinking Thursday.
Questions? Contact Sarah, the museum's education coordinator.