I love blooming flowers in the spring and summer, but unfortunately, they don’t like my allergies. If you or someone you know is like me, these painted hyacinths are a great way to add the color of flowers without all the pollen! This is also an inexpensive way to send flowers to brighten someone’s day. The great part about this project is that there are very minimal and inexpensive materials, making this a great project all around!
Find a helpful how-to video below:
Materials
- Construction Paper or Cardstock (green and a background color)
- Scissors
- Glue
- Paint for Hyacinth Flowers (purple, pink, white, blue, etc.)
- Paint Palate (or something else to put your paint on)
- Pop or Water Bottle Lid (or anything else round you can use to stamp with)
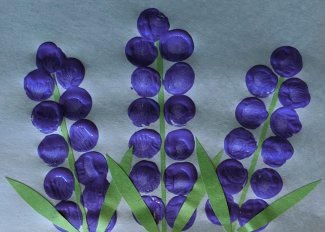
Instructions
- Using your scissors and green paper, cut three skinny strips of paper to use as your flower stems. In addition, cut out six leaves from your green paper.
- Place your background paper in a landscape position on your workspace. Use your glue to glue your three stems to the paper (make sure to space them out so you have plenty of room for your flowers).
- Pour some paint on your paint palate.
- Dip the flat part of your lid into the paint, then stamp it next to the green stem on your paper. Repeat this process until you are satisfied with the fullness of your flowers.
- Let the project dry before gluing a leaf on both sides of each flower.
Make-It Monday projects will be posted each Monday (except for holidays) throughout the museum closure for COVID-19. For a full list of previous projects, visit Make-It Monday.
Questions? Contact Sarah, the museum's education coordinator.