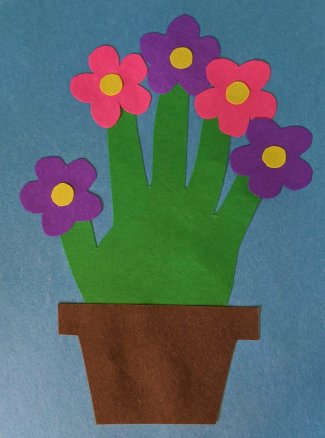
This week for Make-It Monday, we are creating fun and colorful handprint flowers. While some might use this to decorate at home, another good use for this project is sending it in the mail to a friend or family member you can’t visit right now. While this project is sure to add a splash of color to your life, it’s also a great keepsake to remember little hands with!
Find a helpful how-to video below:
Materials
- Construction Paper or Cardstock (green, brown, yellow, 1-5 different colors for flowers, and a background color)
- Writing Utensil
- Scissors
- Glue
- Markers
Instructions
- Using your writing utensil, trace a handprint on the green paper. Cut this out using your scissors.
- Out of the brown paper, cut out a flowerpot.
- Using your writing utensil, draw out flower shapes on the paper colors you want to use for flowers. Cut them out using your scissors. You will need five flowers total.
- Cut out five circles out of your yellow paper. They should be small enough to be the centers of your flowers.
- It’s time to glue! Glue your items together in this order:
- Glue flowerpot to the base of the handprint.
- Glue flowerpot and handprint to your background paper.
- Glue a yellow circle to the center of each flower.
- Glue your five flowers to the end of each finger.
- Grab your marker – be sure to mark whose handprint this is and how old they are!
- If you would like, you can also use your marker to add a message or greeting like “Miss You Bunches” or “Love You, Grandma”. The possibilities are endless!
Make-It Monday projects will be posted each Monday (except for holidays) throughout the museum closure for COVID-19. For a full list of previous projects, visit Make-It Monday.
Questions? Contact Sarah, the museum's education coordinator.