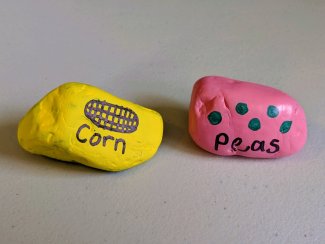
Spring means garden planning for many people across the state – gardeners are eagerly making plans, buying and starting to grow seeds, and dreaming of warm, summer days. If you are looking for a fun way to show what you are growing this year, check out these fun garden markers!
Find a helpful how-to video below:
Materials
- Rocks
- Paint (variety of colors)
- Paintbrushes
- Permanent Markers (optional)
- Paint Pallet (or disposable plate)
- Clear Sealant (optional)
- Paint Protection (smock or old t-shirt to wear and tablecloth or something to work on)
- Cleaning Supplies (water, soap, and paper towels)
Instructions
- Let’s get ready to paint! Throw on a smock or old t-shirt to wear in case you spill some paint and cover your work surface with a tablecloth or something you can get paint on.
- Gather your rocks and clean them with soap and water. You’ll want one rock to mark each thing you are planting. Allow rocks to dry.
- Pour out some paint onto a paint pallet or plate to use for a base coat. I suggest using something that is bright and easy to see on the grass or soil.
- Using your paint brushes, paint a base coat on your rocks. Allow time to dry.
- Once dry, use a small paint brush and paint OR a permanent marker to decorate your painted rocks. You can paint a picture of what you are planting, write the name, or both! Allow time to dry.
- If you want to keep these rocks beautiful for years to come, you can use a clear sealant to seal and protect your work. If not, you might have to make some touch-ups in the future!
- Allow everything to dry for 24 hours before using, and have fun planting!
Make-It Monday projects will be posted each Monday (except for holidays) throughout the museum closure for COVID-19. For a full list of previous projects, visit Make-It Monday.
Questions? Contact Sarah, the museum's education coordinator.